


Hello! This article will walk you through setting up an automation to add Teaming List form submissions from Jotform to a table in an Excel spreadsheet, and then embed that table on a webpage so it is viewable to the public.
Prerequisites
- A Jotform form for collecting data to add to the teaming list.
- An Excel spreadsheet to collect submission data. This document will be embedded on a webpage and will be fully viewable; please ensure anything on it is fit for public consumption.
Automate Submission Data → Excel Spreadsheet
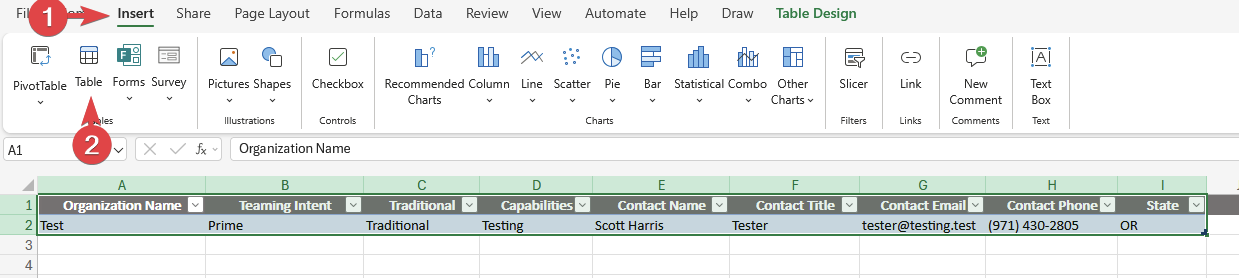
- Open the spreadsheet and create a table to insert data into. Select the area you want to convert into a table (I recommend adding headers first) and click Table on the Insert tab.
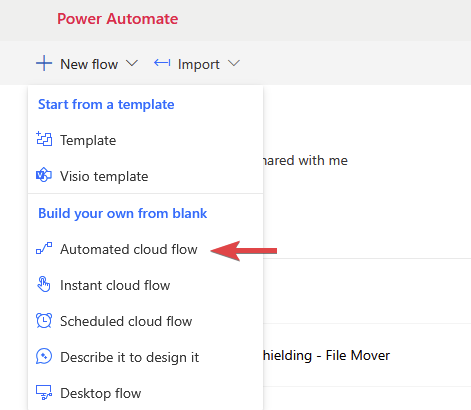
- Open Power Automate and create a new Automated cloud flow.
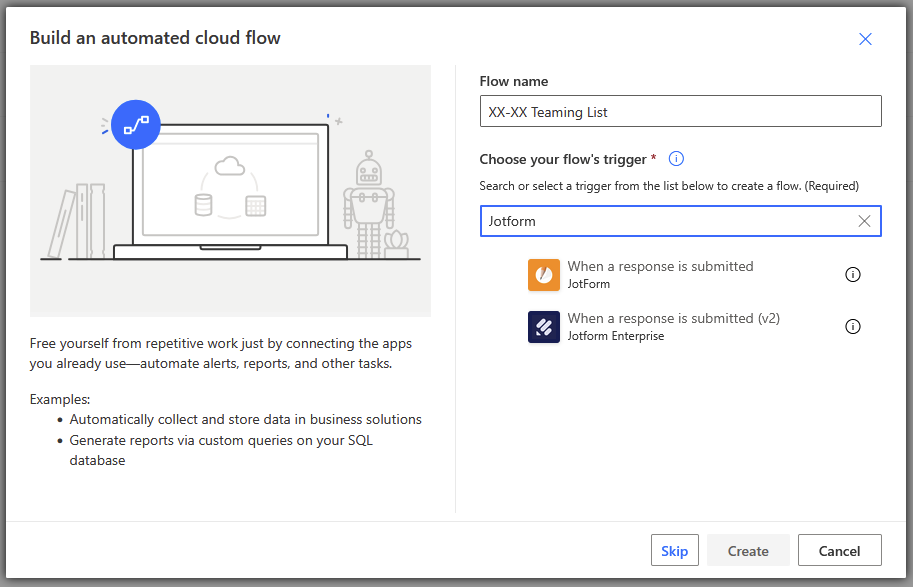
- Assign the flow an easily identifiable name and select the trigger When a response is submitted (v2) by Jotform Enterprise.
- Switch the editor to the new designer. When prompted select Switch without saving.

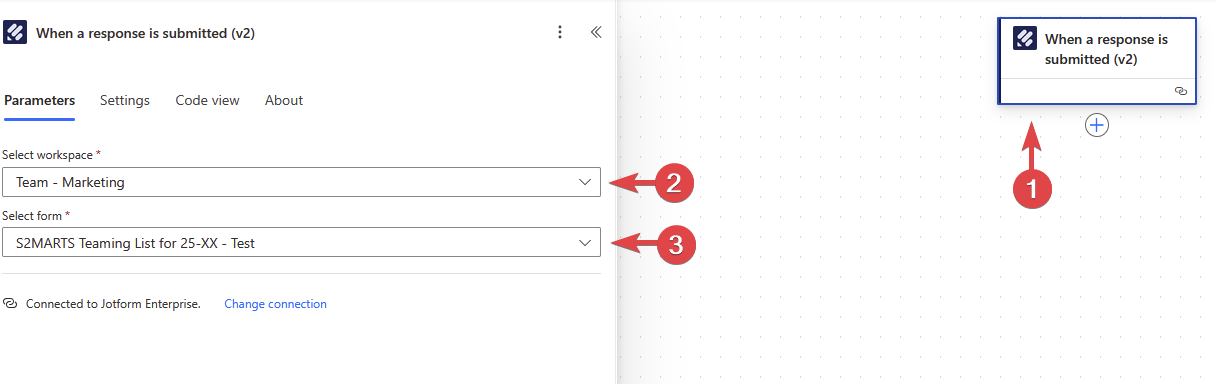
- Select the trigger and select the relevant Jotform workspace and form.
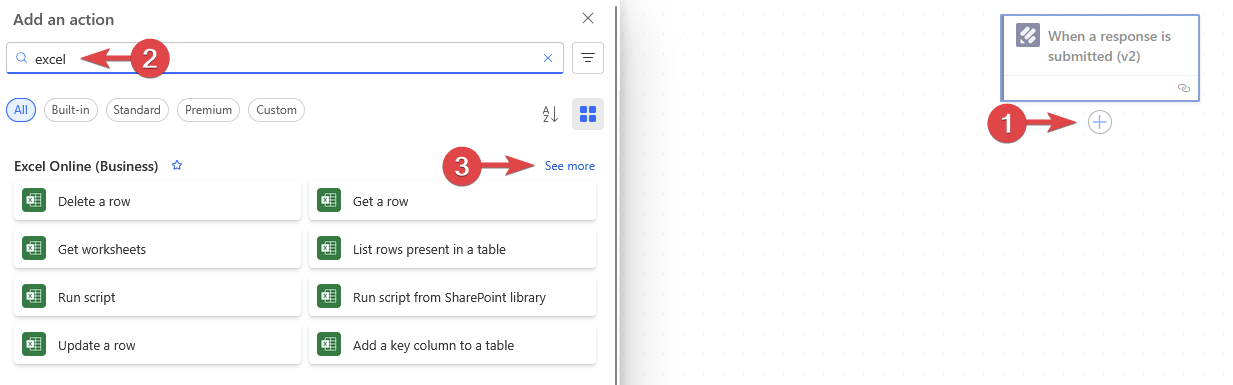
- Click the plus sign to add a new action, search for Excel, and click See more across from Excel Online (Business). In the list of Excel actions, select Add a row into a table.
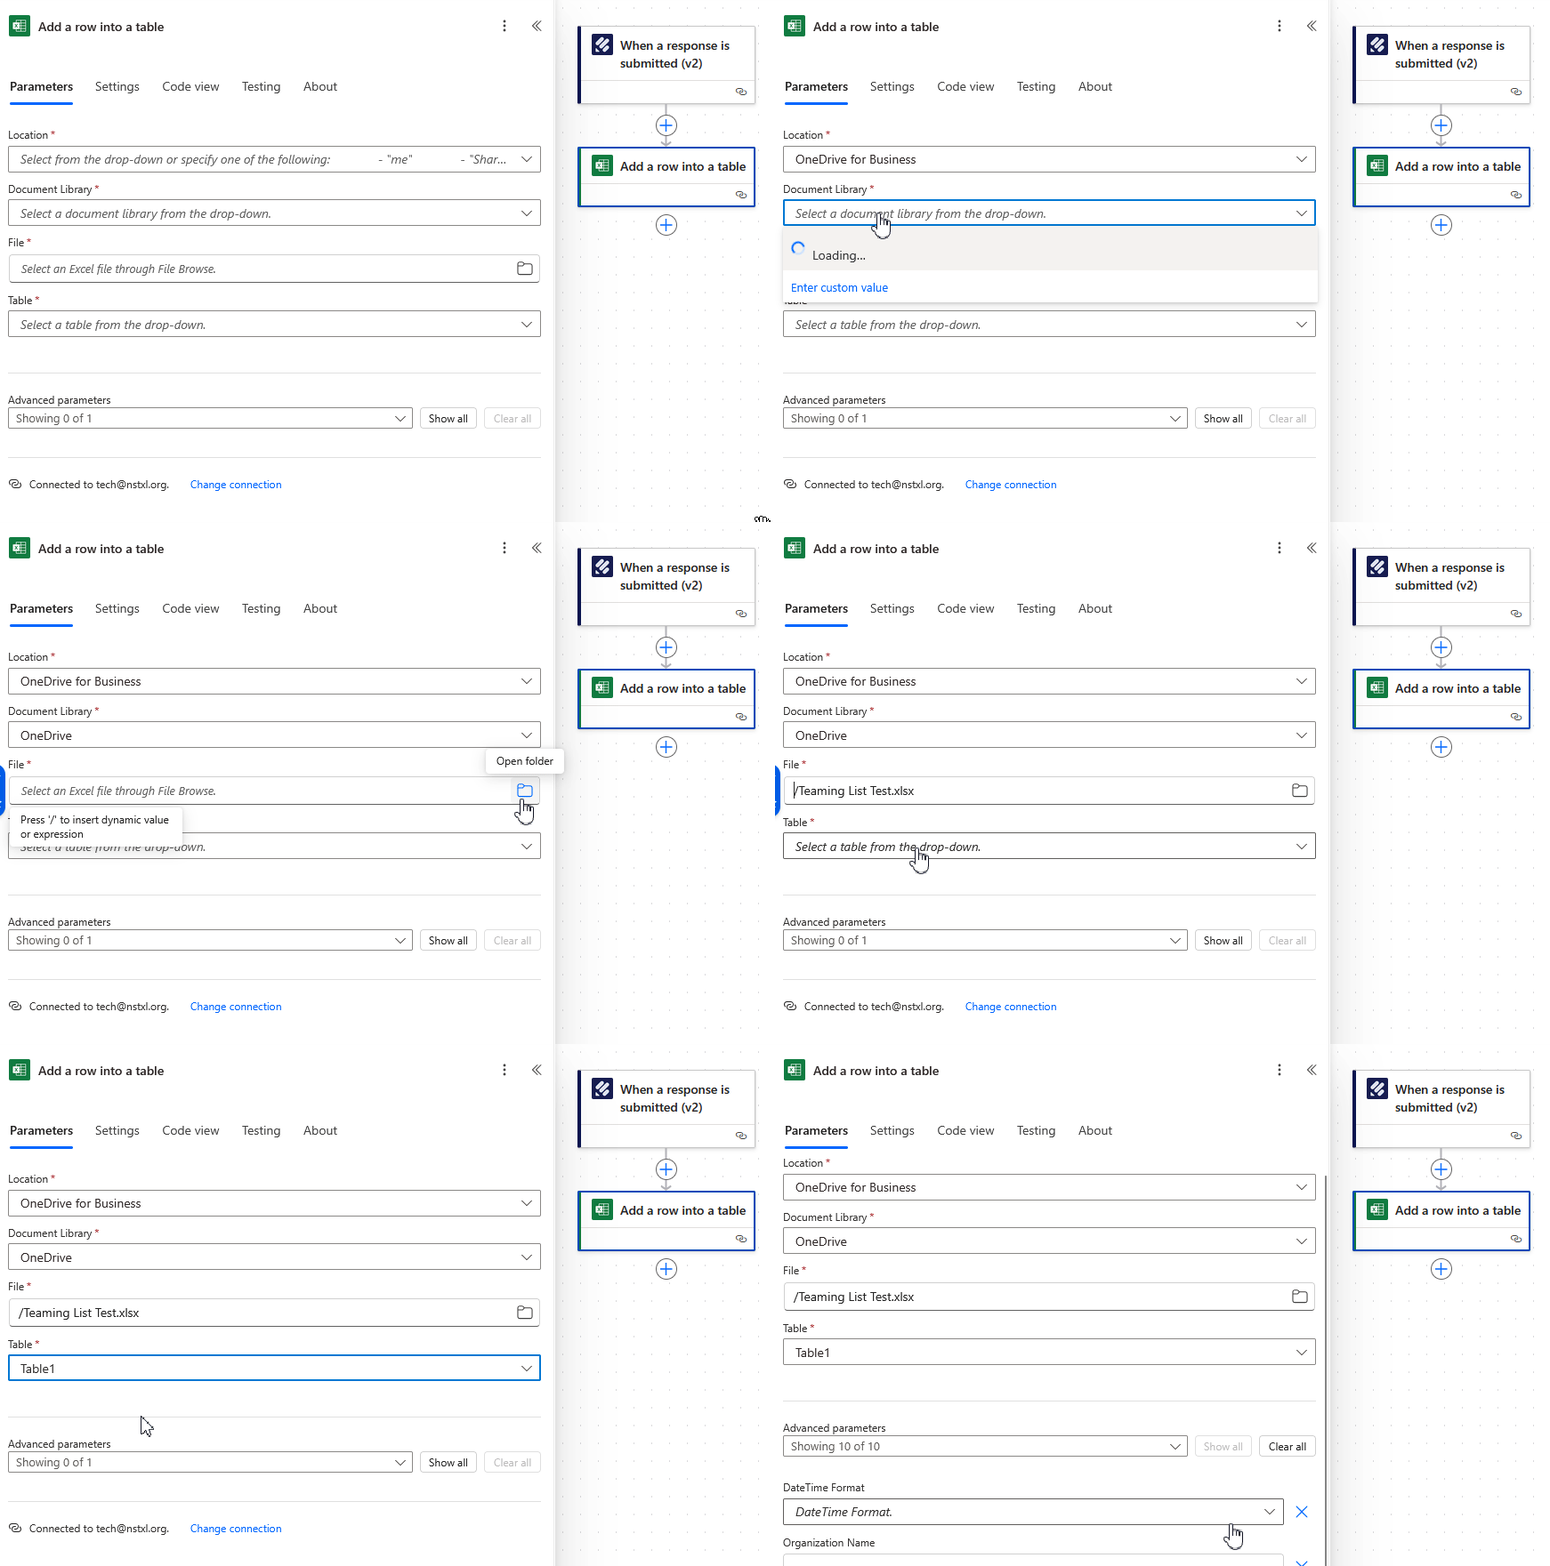
- Select the Add a row into a table action and progress through the selection fields on the left to point to the correct file/table.
Location: If the file is in your OneDrive, select OneDrive for Business. Otherwise select the relevant SharePoint Site.
Document Library: This will be OneDrive or Documents, depending on the Location selection.
File: Use the folder icon to open the selection tool to browse to and select the spreadsheet.
Table: Select the table you created in the spreadsheet in step 1.
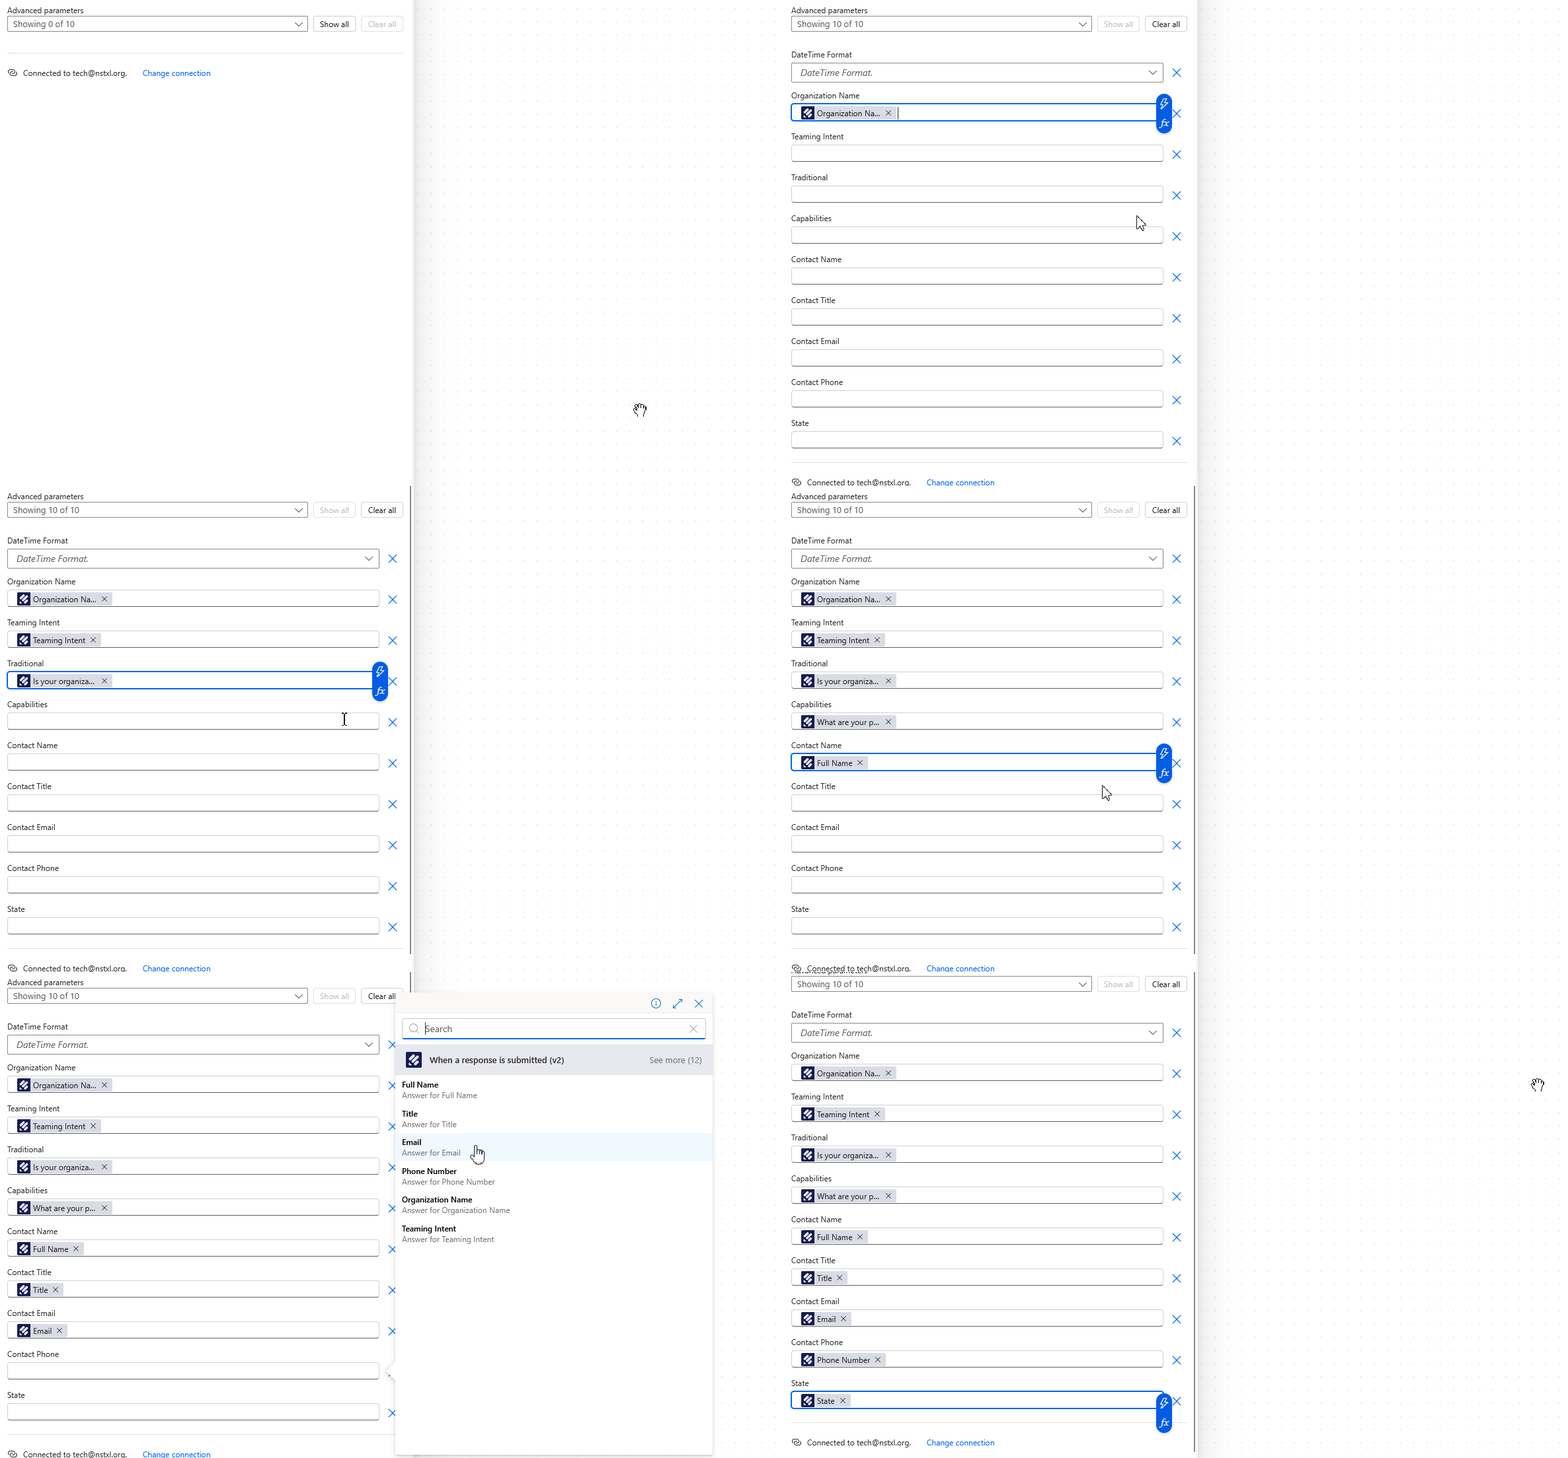
- After the table is selected (give it a moment to read the table properties), the Advanced parameters section will update with all of the table columns. Using the dynamic expression button, map each form field to the corresponding table column. Note you do not have to use all the form fields and can leave table columns blank.
- Save the Power Automate Flow (wait for it to confirm successfully saving), then click Back to return to the flow overview.

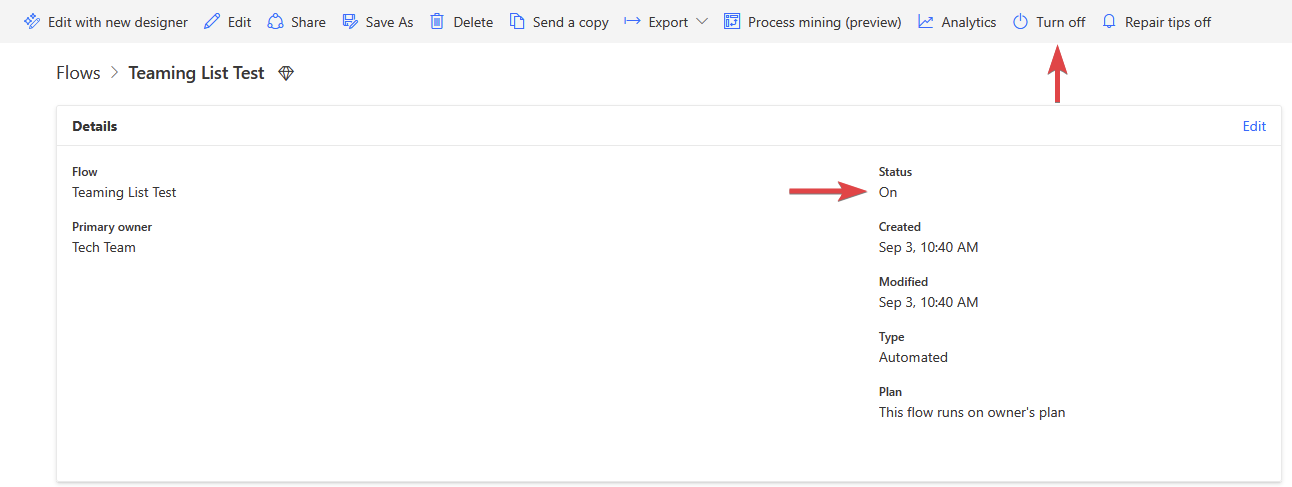
- Ensure the flow status is On. If it is not, click the Turn on button in the top row.
Embed the Excel Spreadsheet as a Table on a Webpage
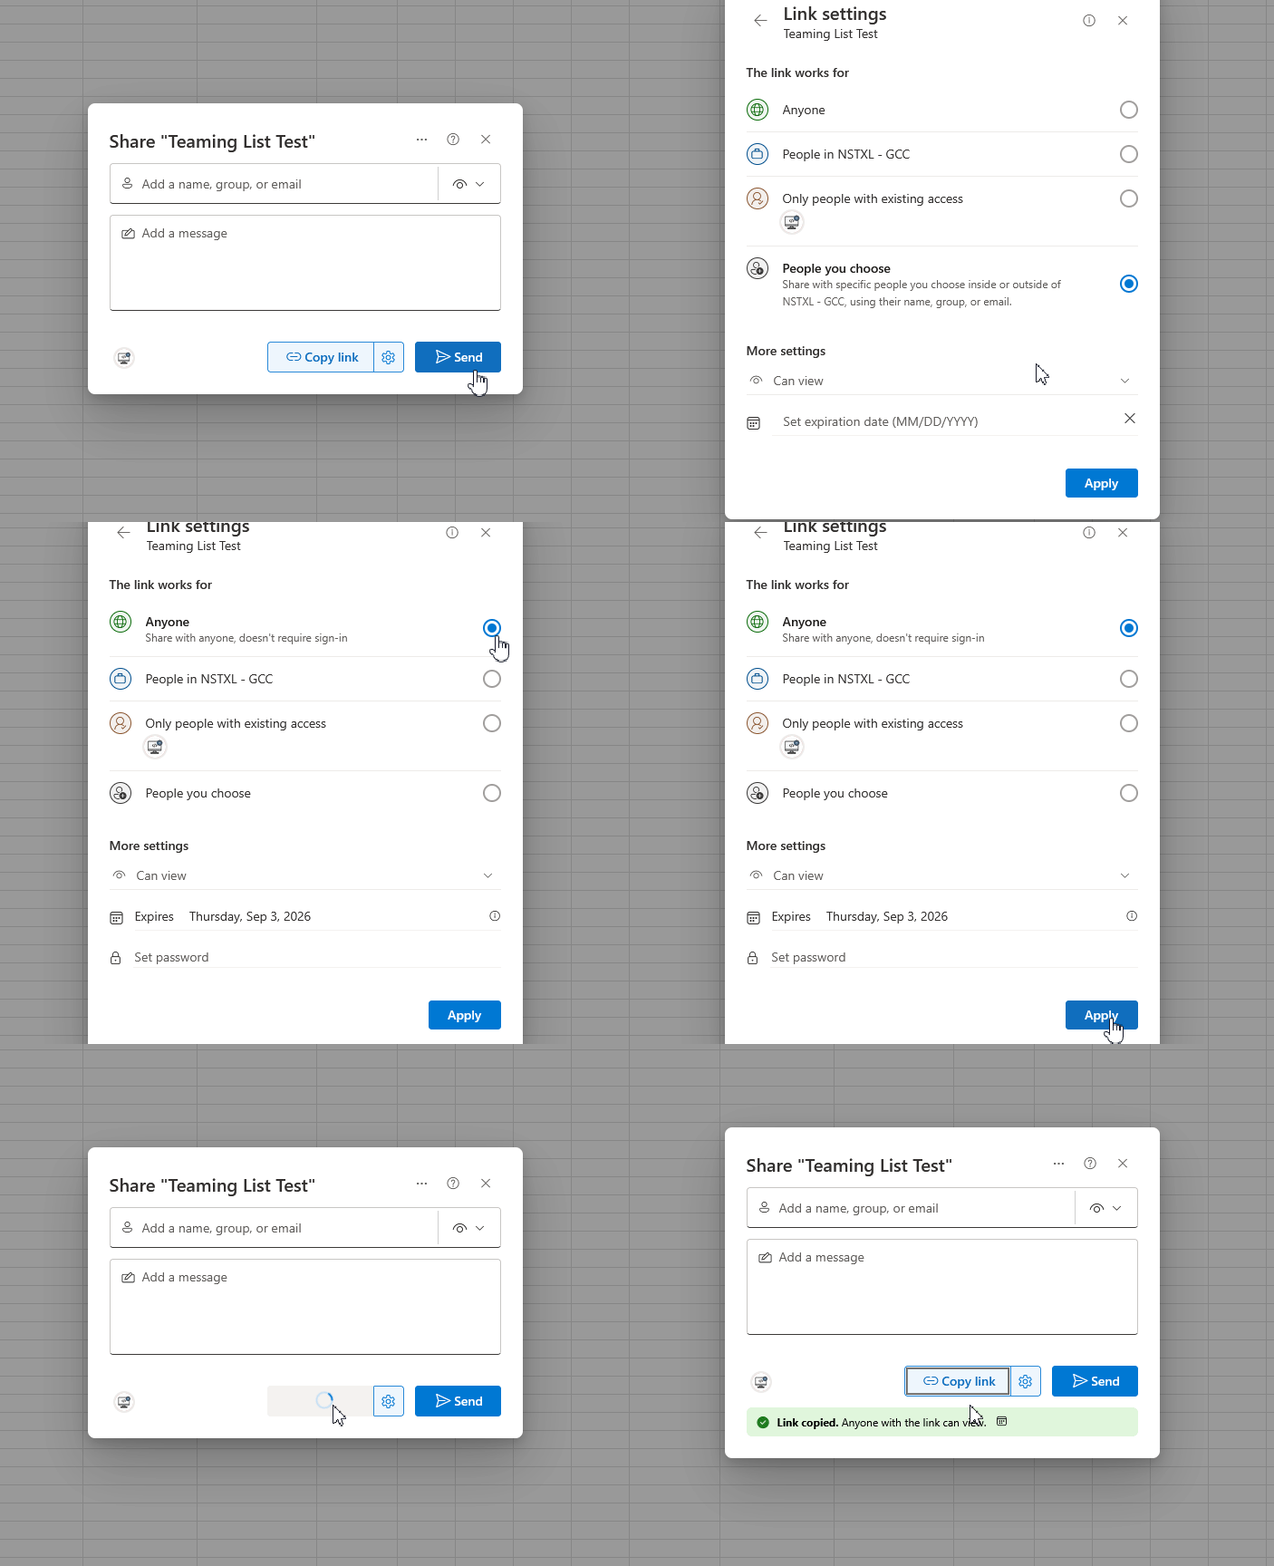
- In order for the embedded table to be viewable without having to sign in, the document needs to have a valid Anyone link. Open the Sharing menu and generate an Anyone link. Hold onto that link, you'll need it a moment.
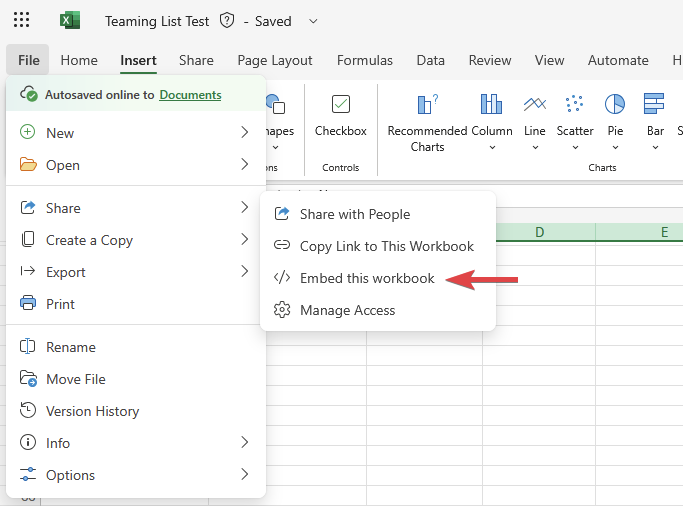
- Go to File | Share | </> Embed this workbook.
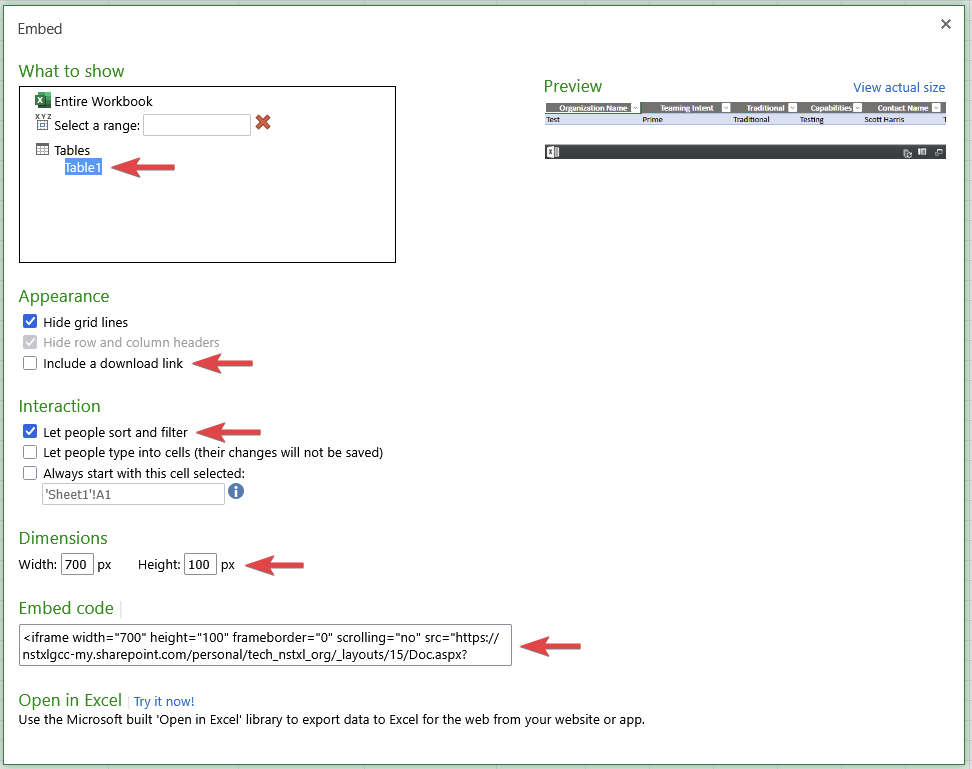
- In the configuration options, select the table and adjust options as needed. It is recommended to disable download links and allow sorting/filtering. It might take a little experimentation to get the width and height just right for the page the table will be embedded into. When ready, copy the Embed code.
- Time for some URL surgery: paste the embed code into a text editor (Notepad or Word work fine). You need to swap the normal embed URL with the anyone link you generated earlier. The URL is in between src=" and ?sourcedoc
Example:
Original embed code (URL in red):<iframe width="700" height="100" frameborder="0" scrolling="no" src="https://nstxlgcc-my.sharepoint.com/personal/tech_nstxl_org/_layouts/15/Doc.aspx?sourcedoc={9673ae66-039e-4da6-9942-5eaa5f9e6963}&action=embedview&Item=Table1&wdHideGridlines=True&wdInConfigurator=True&wdInConfigurator=True"></iframe>
Anyone link:https://nstxlgcc-my.sharepoint.com/:x:/g/personal/tech_nstxl_org/EWauc5aeA6ZNmUJeql-eaWMBb13-JVZNqjLFt0Ts2sq5Pg
Swap the URLs:<iframe width="700" height="100" frameborder="0" scrolling="no" src="https://nstxlgcc-my.sharepoint.com/:x:/g/personal/tech_nstxl_org/EWauc5aeA6ZNmUJeql-eaWMBb13-JVZNqjLFt0Ts2sq5Pg?sourcedoc={9673ae66-039e-4da6-9942-5eaa5f9e6963}&action=embedview&Item=Table1&wdHideGridlines=True&wdInConfigurator=True&wdInConfigurator=True"></iframe>
- The embed code can now be used on a webpage and will result in something that looks similar to this:


